Hello everybody, welcome to my recipe page, If you're looking for new recipes to try this weekend, look no further! We provide you only the best Sourdough starter recipe here. We also have wide variety of recipes to try.
Before you jump to Sourdough starter recipe, you may want to read this short interesting healthy tips about {The Basics of Being Healthy. Getting A Healthy Eater
Camp cooking can be as elaborate or simple as you want it to be. If you want to prepare fast and simple but nutritious meals when you’re swimming, camp cooking does not even need to need a flame. But if you’re thinking about ridding your camping excursion with a feast, camp cooking can enable you to earn warm, healthy foods which are as good as you can create them at home in your kitchen.
Camp cooking does not have to be limited to sandwiches and baked potatoes wrapped in aluminum foil. Just about any cooking process you are using in the kitchen could be duplicated around the campfire. For example, use a dutch oven or pit cooking to consume your meals. You might also easily bake foods at a pan over a grill, or boil, braise and beverage. What type of camping cookware is ideal for you? Camp cooking and clean-up may be easy or a hassle, it all starts with great camping equipment.
Some pots/pans come in sets that mate together or"nest" for storage and even allow you to tuck a spoonful of gas within them. This really also comes in handy once you’re looking to save space while camping.
Following are some camping things to consider with you if you’re planning on preparing some meals around the home. These common kitchen items allow you to duplicate tasty meals while you are out of doorways.
• Salt and pepper • Other of your favourite herbs and spices • Cooking oil • Pot holder
• Aluminum foil
• Cutting knives • Cutting board • Mixing bowl • Paper or plastic silverware, plates and cups
If you have just a couple of campers and are looking for some very easy camp cooking, try out the simple and speedy technique of tin can cooking. All you’ll need is a clean tin can – a 1 gallon size may works nicely. Your source of heat may be little campfire, or if wood burning is prohibited, a little buddy burner will work nicely, which may be found at sporting good stores or online. Put your meal in the tin can and just warm the contents of your can over a fire. This technique works great for sauces, beans and tuna fish.
A more time-consuming camp cooking technique which also produces yummy food is pit cooking. It’s also a wonderful camp cooking system if you are using a dutch oven or cast iron cookware. Pit cooking warms your food by heating rocks and coals which are concealed in the floor. As the stones cool off, their emitted heat cooks the meals. To pit cookfirst dig a hole that’s about three times bigger than your own cookware. Line the pit with stones and build a fire in the middle. When the fire has burnt rapidly for about an hourpush the warm coals and stone into the center. Layer your wrapped food covered skillets on top of the stones and coals and put on top. Following a couple of hours, you will have some delicious camp food to enjoy.
We hope you got benefit from reading it, now let’s go back to sourdough starter recipe. You can have sourdough starter using 25 ingredients and 7 steps. Here is how you cook it.
The ingredients needed to cook Sourdough starter:
- Prepare You need a jar that holds 500ml at least
- Provide Day 1
- Take 80 g wholegrain spelt flour
- Take 20 g white spelt flour
- Provide 100 ml water
- Use 2 tsp raisins
- Take Day 2
- You need 80 g wholegrain spelt flour
- You need 20 g white spelt flour
- Get 100 ml water
- Take 3 Day
- Use 50 g wholegrain spelt flour
- You need 50 g white spelt flour
- You need 100 ml water
- Take 4 Day
- Take 20 g wholegrain spelt flour
- Prepare 80 g white spelt flour
- Provide 100 ml water
- You need 5 Day
- Use 20 g wholegrain spelt flour
- Provide 80 g white spelt flour
- Take 100 ml water
- Use 6 Day
- Prepare 100 g white spelt flour
- Get 100 ml water
Instructions to make Sourdough starter:
- Day 1: put everything in the jar and mix well. Cover loosely so air can get in and out. Leave in a warm place for 24 hrs.
- Day 2: Add the Day 2 ingredients, mix then cover and store as before.
- Day 3: Add the Day 3 ingredients, mix then cover and store as before.
- Day 4: Add the Day 4 ingredients, mix then cover and store as before.
- Day 5: by now things are moving. Discard 1/2 the starter. Add Day 5 ingredients, mix then cover and store as before.
- Day 6: Now it’s about maintenance. Always discard about 1/2 then feed with the 100g flour and 100 ml water.
- If you’re not using the starter, keep it in the fridge. And then refresh ie feed it when you’re ready to use. If you leave it a really long time you need to ‘wash’ it so take a small amt of starter and add flour + water 🤞
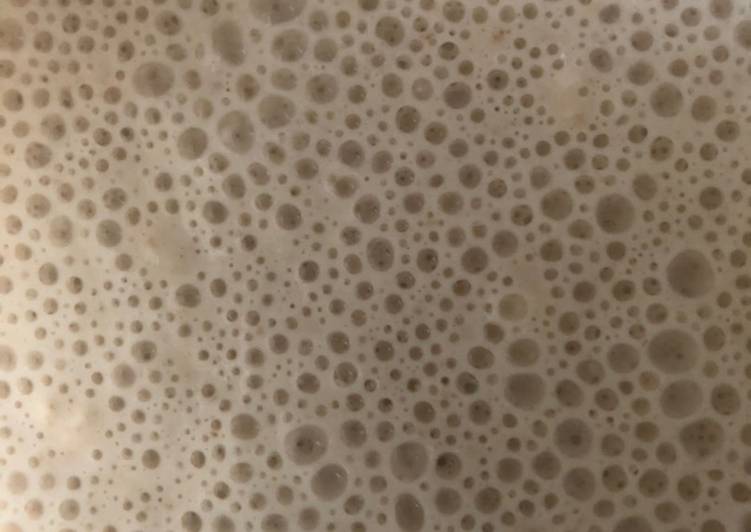
It has grown to become one of the most popular types of bread and has the added bonus of not using conventional yeast, so long as you have a sourdough starter, or 'mother'. Feeding your sourdough starter is basically adding a mixture of flour and water to your existing starter, to keep it alive, happy and nourished. Starter is full of wild yeasts that get hungry, just like we do. These yeasts need "food" in this case, more flour, to stay healthy and active. How often you feed depends greatly on the temperature.
If you find this Sourdough starter recipe helpful please share it to your close friends or family, thank you and good luck.