Hello everybody, welcome to my recipe site, looking for the perfect Milk Butter Rolls recipe? look no further! We provide you only the best Milk Butter Rolls recipe here. We also have wide variety of recipes to try.
Before you jump to Milk Butter Rolls recipe, you may want to read this short interesting healthy tips about {The Simple Ways to Be Healthy. Getting A Healthy Eater
Camp cooking can be as complicated or simple as you want it to be. If you want to prepare quick and easy but healthy meals while you are swimming, camp cooking doesn’t even need to require a flame. However, if you’re considering fueling your camping excursion having a feast, camp cooking can allow you to earn warm, healthy foods which are as good as you can make them at home in your own kitchen.
Just about any cooking process you are using from the kitchen could be replicated around the home. For example, use a toaster or pit cooking to consume your meals. You may also easily fry foods at a pan over a grill, or boil, braise and beverage. Which kind of camping cookware is best for you? Camp cooking and clean-up may be easy or a hassle, and it all starts with great camping gear.
Some pots/pans arrive in places that mate jointly or"nest" for storage and even allow you to tuck a spoonful of gas within them. This really also comes in handy once you’re trying to save space while camping.
Following are some camping items to consider with you if you’re thinking about preparing some meals around the campfire. These frequent kitchen items will allow you to replicate yummy meals as you are out of doors.
• Salt and pepper • Other your favorite herbs and spices • Cooking oil • Pot holder • Hand-held can opener • Aluminum foil
• Cutting knives • Cutting board • Mixing bowl
In case you have only a couple campers and are searching for some very simple camp cooking, try the easy and fast technique of tin could cooking. All you’ll need is a clean tin can – a one gallon size can works nicely. Your source of heat can be a small campfire, or if wood burning is prohibited, a little buddy burner may work nicely, which may be found at sporting good stores or online. Put your meal from the tin can and easily warm the contents of your can over a fire. You will have a hot meal ready in seconds. This technique works great for soups, beans and poultry.
A more time-consuming camp cooking technique which also produces yummy food is pit cooking. It’s also a excellent camp cooking method if you are using a dutch oven or cast iron cookware. Pit cooking warms your meals by heating rocks and coals which are concealed in the floor. As the stones cool away, their emitted heat cooks the food. To pit cookfirst dig a hole that is roughly three times bigger than your cookware. Line the pit with stones and construct a fire in the middle. Once the flame has burned rapidly for approximately one hour, push the hot coals and stone into the center. Twist your wrapped food covered skillets on top of the rocks and coals and put more on top. After a couple of hours, you’ll have some tasty camp food to enjoy.
We hope you got benefit from reading it, now let’s go back to milk butter rolls recipe. You can have milk butter rolls using 10 ingredients and 14 steps. Here is how you do that.
The ingredients needed to make Milk Butter Rolls:
- Provide 190 grams ☆Bread (strong) flour
- You need 20 grams ☆Cake flour
- Take 20 grams ☆Skim milk powder
- Use 20 grams ☆Sugar
- Use 2 1/2 grams ☆Salt
- Get 2 1/2 grams ☆Dry yeast
- Provide 25 grams Unsalted butter
- Provide 10 grams Shortening or vegetable oil
- Prepare 150 grams Milk
- Get 1 egg + 1 1/2 tablespoons water Egg wash
Instructions to make Milk Butter Rolls:
- Place the powdered ☆ ingredients in a bowl, placing the dry yeast and salt well apart so they don't touch directly, and mix well. Add the milk and keep mixing until it's no longer powdery.
- Start kneading. You can do this by hand, in a mixer, or in a bread machine. Knead the dough properly until it forms a gluten film. When you stretch the dough out slowly it should form a thin, translucent film. I used a mixer for 10 to 15 minutes.
- When a gluten film is formed, divide the dough into about 10 pieces using a pastry scraper. Add the shortening and butter and knead them in.
- Keep kneading well until a strong gluten film forms. I knead it for about 7 to 10 minutes. The timing is a guideline only - check your dough to see when to stop.
- Round the dough off into a ball with a smooth, taut surface. Place the dough in a bowl, cover the bowl with plastic wrap and leave to rise at 30°C for 50 to 60 minutes (1st rising).
- When the dough has increased to more than twice its volume, it's good. I checked it by poking the dough with a finger (if the dough doesn't fill the hole back in, it's good).
- Fold the dough into thirds, and press to deflate. Divide the dough into 8 pieces, round off each piece into a ball with a smooth, taut surface, cover with plastic wrap and leave to rest at room temperature for 15 minutes.
- After the dough has rested, press down on each piece to deflate. Roll each piece out into an oval shape. Fold the top and bottom sides down towards the center, and press down.
- Fold the dough over in half, and press the seam securely closed. Be careful not to include any air bubbles. Using both hands, stretch the dough out so it's almost 30 cm long.
- Roll the dough out to form a long teardrop shape, that's about 25 cm long. Start rolling it up from the wider end. Seal the end of the roll securely and place the roll so the seam is on the bottom.
- Cover with plastic wrap and leave for the 2nd rising, until the rolls have increased by 2 to 2 1/2 times their original size. It took me 30 to 40 minutes at 30°C (in the summer). Preheat the oven to 180°C.
- Make the egg wash and brush it on the rolls. If it's not too much work, it's best to strain the egg wash to remove any impurities, so that you have a smooth, flawless finish on your rolls.
- When the oven has finished heating, lower the temperature to 170°C and bake the rolls for 15 minutes (check to see how they are going and adjust the time). Done!
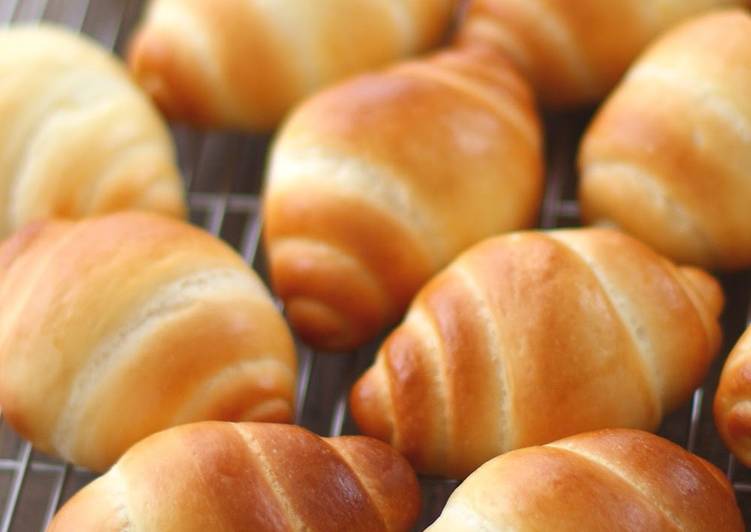
- Soft and fluffy and tender.
Butter: I like to use salted butter in these rolls. The butter rolls are wonderful served warm, or freeze and heat another day. These incredible buttery yeast rolls are the ideal side for your Sunday dinner or holiday dinner but are easy enough. This recipe for old fashioned butter rolls is easy to prepare. The sweet milk sauce and pastry These rolls are less cinnamon roll and more pie crust.
If you find this Milk Butter Rolls recipe helpful please share it to your close friends or family, thank you and good luck.